In the last few days I’ve decided to do a little bit of extra work on our first year project :”Filtrate”. This was due to me wanting to show something off at Open Day.
For this who don’t know, this is FIltrate:

Rather, that is a screenshot from the current version.
Main game
Some of the things I updated on it were as follows:
- Adjusted player movement. This was because the player jerked to left or right when pressing the arrow key. In theory, this was a good move to begin with because it meant the player moves in that direction instantly, but as we added better physics to the game it started to not work well. The reason for this is that when you hit an arrow key, it set the player speed in that direction instead of increasing the speed. This meant that you couldn’t do precision landings and also it caused the player to move unnatural when he moves in one direction and then changes direction.
- Added a circle around the player that reveals what’s behind the player in other dimensions. This was extremely difficult and the end result was really good.The first attempt, I tried to use a white oval behind the player that was used as alpha on the background. This didn’t work mainly because I couldn’t figure out how to set up the blending very well and I moved onto another method.The second method I used was a single large image that was completely white but had hole in the center. This was then placed over the player and the blending functions were applied for the filters using this rather than a white square which is what it was before. This worked well and is how it’s used now. I then made the square change size randomly to make it seem like it was flickering, creating the effect that it’s stuff from another dimension.
- Added a smokey effect in the dimension circle around player. This also turned out really good. The way I did it was also extremely hard. I’ve explained it all below.
- Added more levels. This was a result of improving the level editor and just making levels as I tested it. Some weren’t saved, which is sad. But there are some easier levels at the start that introduces the player to the basics slower.
Smokey dimension effect
This is the effect in the game that allows you to see smokey effects on objects in other dimensions directly behind the player.
First, I calculate the red, green and blue filter colours. THese are eased based on what filter has been selected with a formula c += (0 – c) / delay for colours not selected, and c += (255 – c) / delay for the current filter colour. This wasy the colours that are off blend down to 0 over time and the colour that’s active will blend up rto 255 over time. These are not actually applied to the filter, yet but are needed in the next step.
I then negate these colour values as the blending needs the opposite colour to “show” the actual filtered objects behind it (so to see red the blend needs to be 0, 255, 255, which is all colours BUT red).
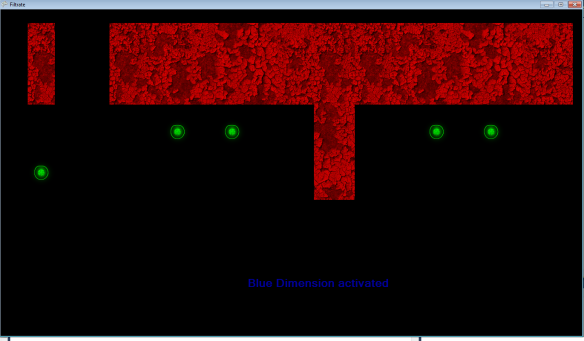
I then set up the first spritebatch (XNA for the win) which uses an additive blend state. This is used to render the “Below” level (Everything that is filtered, eg. Not the player and start/end doors or HUD etc.) This draws in 2 modes: 1 draws ONLY the FILTERED dimensions that are NOT active. So if I have red filter activated, this will draw only the green and blue dimensions, but not the white dimension. The reason for this is explained later.

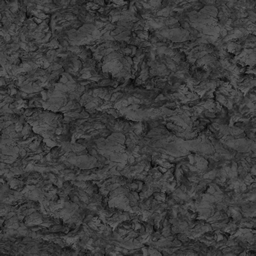
The next step is to draw the smoke. The smoke effect is a tiled square of smoke (actually an inverted black and white water texture)
 This is applied using a “multiply” effect (darker areas are drawn more, lighter areas are more transparent). This causes the effect of dark smokey patches over the top of the underlying dimensions. I then made the UVs rotate upwards and positioned it relative to the camera.
 The NEXT step was to render the rest of the level. The easiest part is to draw the neutral dimension. The other dimension (the blue one in this case) needs to be drawn at a percentage of how far along the transition is. Otherwise if we draw the dimensions “if others are off” they will switch instantly and we lose the fade effect on elements on the previous dimension.
 As you can see from the screenshot, it is starting to make sense why I’ve done it this way. The neutral dimension doesn’t need to be drawn to have clouds applied because it’s ALWAYS on. Even though technically it’s still counted as being in that all coloured dimensions.
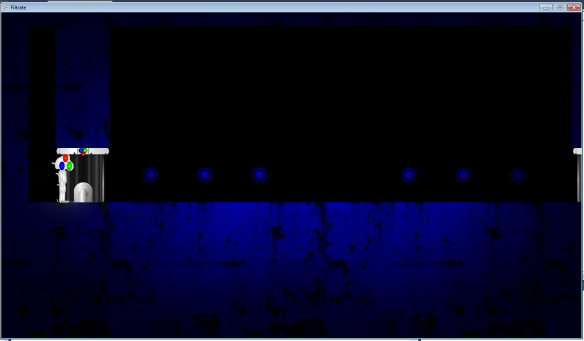
Next, we apply the “filter”, the main aspect of the game. This originally was a stretched plain white 255,255,255 texture, but as mentioned above, it’s been changed to a white square with a tiny hole in the center that reveals our other dimensions with smoke on them (and as you can see, the neutral dimension shines through).
 Notice the green orb is smokey because it’s not part of the blue dimension but the player is standing over it.
Then, I apply a dark border just to add a gloomy atmosphere.
 Then we draw the white objects (this has since been changed so it’s drawn under the gloomy border):
 And finally the static effects, and the HUD:
 Notice that the noise adds a negative effect to the level, which is nice.
Level editor
- Added dynamic title bar – This is so you can see what level you have open, (or Untitled of none) and a * if you have unsaved changes,
- Made save feature on close – Added an inturrupt on any close events that causes a “Save changes?” dialogue box to appear.
- Multiple select items with shift – This was very difficult as object with change properties would change every object’s properties to the last selected item, so I had to add a check on every variable if it’s the same as it was and if not, it edits JUST that property. Worked well in the end.
- Can create platforms dragging up and left now – previously, platforms could only be created by dragging from a point down and right. To fix this I did a check for if the final mouse positon’s x or y was lower than the starting mouse pointer’s x or y and if so, reversed the formula.
- X Y Width Height in properties now NumericUpDown – Before this was a textbox which not only needed converting, but had to be edited to see changes. Now you can just click up or down on the arrowds on eahc box.
- Made texture in properties a dropdown with default “” – I plan on implementing this properly for the sake of variation in levels. Levels will have customisable textures for help signs etc.
- Removed corkscrew button / removed goose button – These weren’t implemented
- Added zoom function – Can zoom in and out by multiples of 8
- Added shortcuts for menu items Ztrl+O opens etc.
- Got Exit to work / Got New to work – they obviously didn’t work. Exit also promps for save.
- Added caution box for unsaved data – as mentioned above this was implemented by the close inturrupt. This was done with a simple variable that was set to ‘true” when something was deleted or added to the scene. And set to false when the level is actually saved. This state is used to add the * in the title bar.
- Added check for locked files – If the level editor tries to save a file that is locked, it would crash. To stop this I added a function that used try / catch on the file stream.
- Clicking nothing de-selects everything – I kept doing this to de-select items so I just implemented it by making use of the function “DeselectEverything” that had already been implemented.
- Made 2 levels of grid lines – most of the levels I had made used 2 by 2 sections are they just looked nicer. I added a darker grid line for every second one to help with this sort of level style.
- Made dimension and effect button selections more obvious – Before it was hard to see in the properties panel which button was pressed as they had little background or shading. Now they use bright colours.


